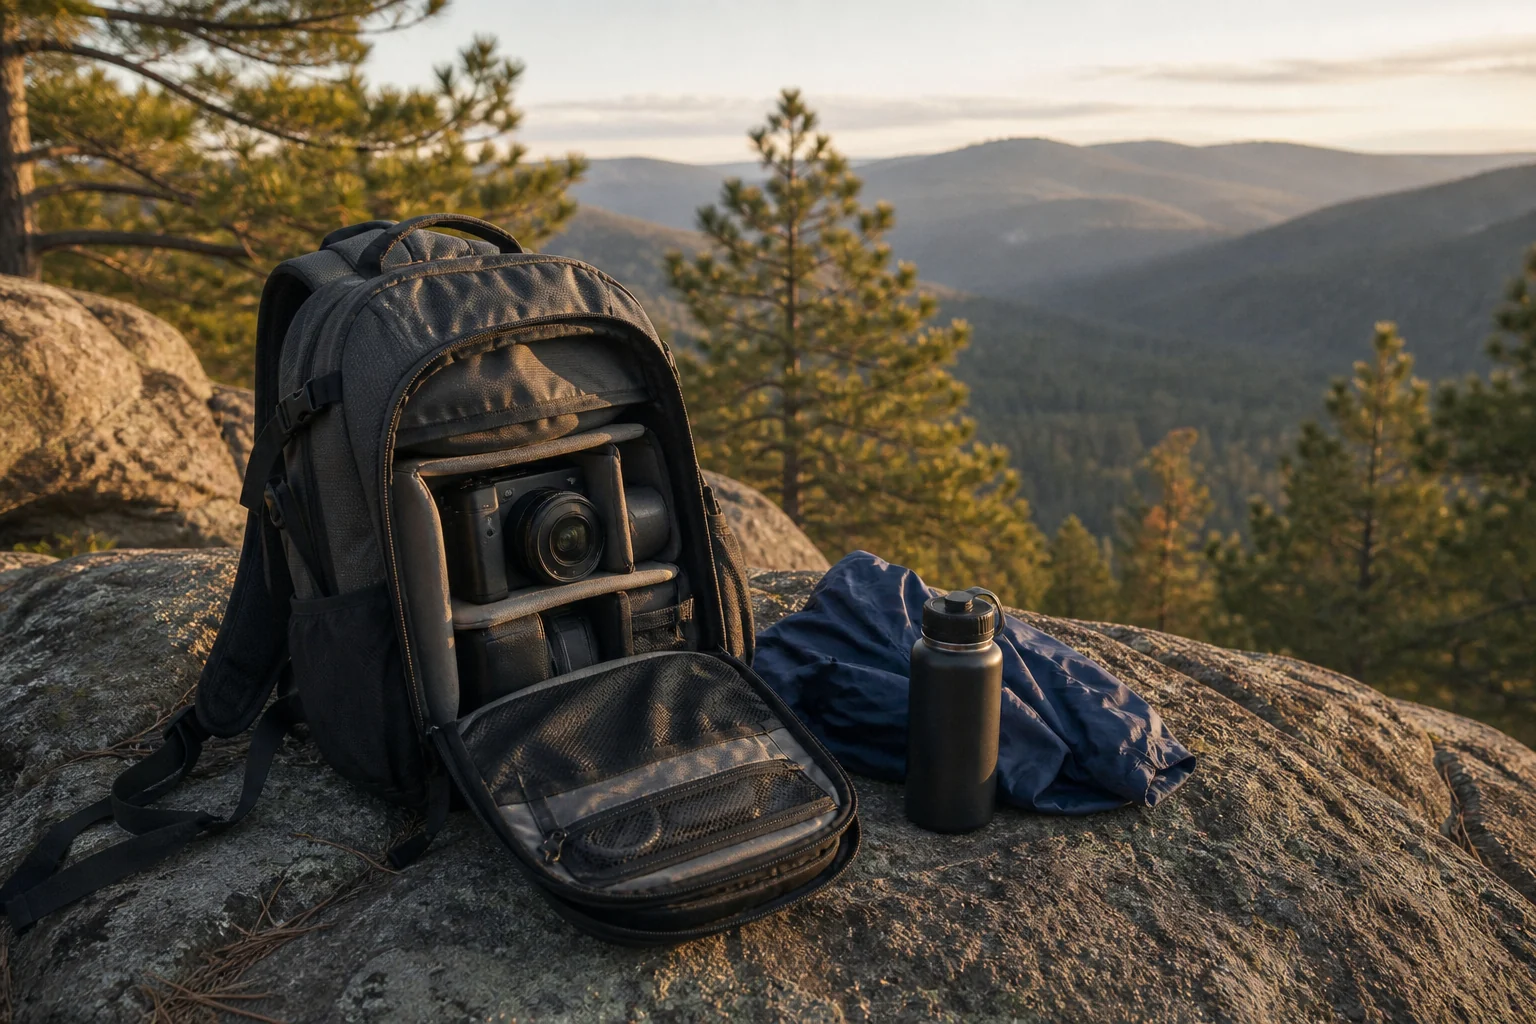
A hiking camera bag is not simply a bag with thick padding. It has to keep dense camera gear stable, transfer weight away from your shoulders, leave room for water and a layer, and let you reach the camera without turning every stop into a full unpack.
Why trail use changes camera bag choice
Camera equipment is unusually dense. A bag can feel comfortable with a sweatshirt inside and become top-heavy after adding a body, a 70–200mm lens and a tripod. A trail pack therefore needs more than padded shoulder straps: for sound weight distribution, the back length must suit the wearer, the load-bearing belt should engage the pelvis, and the camera compartment should hold equipment close to the back rather than letting it sag outward.
Trail access is another compromise. Side access is fast, rear access is secure and keeps straps out of the mud, and a removable camera cube is the most flexible—but no design delivers all three equally well. Weather claims also require care. Water-repellent fabric, coated zippers and a rain cover are useful layers; they do not make a stitched backpack submersible or guarantee that wind-driven rain cannot enter around the harness.
Selection criteria for camera backpacks and camera bags
Start with fit and load transfer, then weigh camera protection, access, room for trail essentials, weather protection, and empty weight. A lower price helps only when the pack still supports its load and keeps the camera compartment stable.
For flying, use the 22 × 14 × 9-inch (56 × 36 × 23cm) maximum published by American Airlines and Delta as a common U.S. reference. A soft pack may compress into a sizer, but “probably” is not the same as compliant. Always recheck your airline and measure the loaded bag, including attachments.
Quick comparison of the best camera backpacks
| Camera backpack | Best for | Capacity, weight, dimensions, and carry-on fit |
|---|---|---|
| Shimoda Action X30 V2 Starter Kit | Comfort and fit range | 30L + 7L roll top; 5.3 lb; 20.1 × 11.8 × 6.7 in.; fits 22 × 14 × 9 in. unexpanded |
| Lowepro Pro Trekker BP 450 AW II | Heavy camera-kit protection | 32L; 5.95 lb; 19.3 × 13.8 × 9.8 in.; too deep on paper |
| Think Tank BackLight Sprint | Lightweight camera-first day hikes | 15L; 2 lb 5 oz; 17.5 × 9 × 6.75 in.; fits |
| Peak Design Outdoor Backpack 45L | Travel plus trail | 45L maximum; 3.97 lb before cube; 23 × 15 × 9 in.; too tall and wide |
| Lowepro PhotoSport BP 15L AW III | One-camera minimalist kit | 15L; 2.43 lb; 17.32 × 9.06 × 7.09 in.; fits |
| f-stop Tilopa 50L DuraDiamond | Wet, winter, and multi-day loads | 50L; 4.2 lb before ICU; 24.5 × 13.7 × 11.1 in.*; too large |
| PGYTECH OneMo Lite 22L | Value and configurable storage | 22L; 3.53 lb; 18.11 × 12.99 × 9.25 in.; too deep on paper |
*f-stop's current page publishes inch and metric depth figures that do not convert to one another. Treat the larger 11.1-inch figure as the safer planning number and measure the loaded pack yourself.
Top 7 camera backpacks and camera packs for hiking
These camera backpack recommendations rank each model by its fit for a specific hiking photographer, not by brand reputation alone. The best camera backpack for a long day under a moderate load is different from the best camera bag for a minimalist setup or a winter photo backpack carrying long lenses and safety gear.
1. Shimoda Action X30 V2 Starter Kit — best camera backpack for comfort
The Shimoda Action X30 V2 Starter Kit is the strongest all-around hiking design in this group. Its three-position torso adjustment spans about 2.7 inches (7cm), and Shimoda offers interchangeable shoulder straps, including women-specific options. A padded, removable waist belt, load lifters and an internal frame help keep dense camera gear controlled. The 30L body can add 7L at the roll top for a puffy jacket or food.
The starter kit weighs 5.3 pounds (2.4kg), measures 20.1 × 11.8 × 6.7 inches (51 × 30 × 17cm), and includes a rain cover and Medium Mirrorless Core Unit. Shimoda lists DWR and carbonate coatings plus YKK SplashGuard zippers, but does not publish a whole-pack waterproof rating. The shell's low-profile depth is useful on narrow trails and falls inside the common U.S. carry-on envelope when the roll top is not overfilled.
Strengths: adjustable torso and strap options; side and back-panel access; two movable bottle/tripod pockets; hydration routing; modular camera insert.
Tradeoffs: it is heavy before adding a camera, and the many straps and attachment points are more elaborate than a casual day hiker needs. An independent Action X review found it comfortable for most day hikes but wanted more lumbar support and hip-belt padding under a heavy load—a useful reason to try it with your actual gear.
Camera compartment and Core Unit compatibility
The included Medium Mirrorless Core Unit V2 measures 11.4 × 11.4 × 5.1 inches (29 × 29 × 13cm) outside and 10.6 × 10.6 × 4.7 inches (27 × 27 × 12cm) inside. Its EVA-laminated dividers, aluminum frame and removable skin form a self-contained insert. Shimoda says it fits non-gripped bodies up to 4.7 inches (12cm) tall and lenses as long as a 70–200mm f/2.8. It aligns with the X30's side door, while the rear panel opens the broader camera area for reconfiguration.
2. Lowepro Pro Trekker BP 450 AW II — best for heavy camera gear protection
Choose the Lowepro Pro Trekker BP 450 AW II when the camera kit matters more than keeping the empty pack light. Its 32L body devotes 28L to equipment, and Lowepro rates it for two pro mirrorless or DSLR bodies, five or six additional lenses, a 15-inch laptop, a 10-inch tablet and a tripod. The MaxFit divider system uses laminated, adjustable walls to hold gear closely rather than leaving open space around heavy lenses.
The pack weighs 5.95 pounds (2.7kg) and measures 19.3 × 13.8 × 9.8 inches (49 × 35 × 25cm). Lowepro lists 1680D ballistic polyester, 420D ripstop nylon and 500D polyester on current Green Line versions, plus an included All Weather cover. The shoulder straps stow and the waist belt detaches for travel. However, the 9.8-inch published depth exceeds American and Delta's 9-inch limit even though Lowepro calls the design carry-on ready.
Strengths: deep protective divider system; high camera capacity; padded harness and removable waist belt; included weather cover; laptop and tablet storage.
Tradeoffs: nearly six pounds empty is a real penalty uphill, and a camera-dominant interior leaves less practical space for layers, lunch and emergency gear. A B&H field review praised its comfort on a hike but also illustrates its boxy, gear-first character. This is best for short approaches with expensive long lenses, not a fast all-day traverse.
3. Think Tank BackLight Sprint — best lightweight camera pack for day hikes
At 2 pounds 5 ounces (1kg), the Think Tank BackLight Sprint is the lightest camera-first pack here. The 15L body measures 17.5 × 9 × 6.75 inches (44.5 × 23 × 17cm), with an 8.25 × 16.5 × 5.5-inch (21 × 42 × 14cm) camera interior. Think Tank says it holds one standard body with one to three standard zooms—or several primes—and its long interior can accommodate some attached telephoto zooms.
Rear-panel access keeps the harness off wet ground and places the equipment near your back. Two cinching side pockets each accept a 32-ounce Nalgene or a tripod, while a 2L front pocket holds only the smallest personal essentials. The 420D nylon shell has DWR on the face and polyurethane coating underneath, and a seam-sealed rain cover is included.
Strengths: excellent capacity-to-weight ratio; back-panel access; two genuinely useful water-bottle pockets; removable padded waist belt; compact carry-on dimensions.
Tradeoffs: there is very little space for a substantial layer or lunch, and the slim removable belt cannot transfer weight like the frame-and-belt system on the Shimoda. Shutter Muse's detailed review specifically found the hip-belt attachment less effective at moving load to the hips. Keep the kit disciplined and this is a nimble camera bag; overload it and its weight advantage becomes less meaningful.
4. Peak Design Outdoor Backpack 45L — best camera backpack for travel plus trail
The Peak Design Outdoor Backpack 45L is a hiking pack first and a photo backpack after adding a Camera Cube. That separation is useful for trips where the same bag carries photo gear one day and ordinary camping or travel gear the next. The internally framed roll-top has a waist belt, hydration compatibility, broad exterior pockets, Capture Clip attachment points and both top and rear-panel access.
The pack itself weighs 3.97 pounds (1.8kg), reaches 45L (2,746 cubic inches), and measures 23 × 15 × 9 inches (58.4 × 38.1 × 22.9cm), according to Pack Hacker's measurements. Its Terra Shell is 210D recycled ripstop nylon with a TPU coating; Peak Design describes the construction as weatherproof, but publishes no hydrostatic-head rating for the complete bag.
Strengths: the best split between travel clothing and camera gear; multiple cube sizes; a frame and waist belt that support weight distribution; four large exterior pockets; rear-panel opening.
Tradeoffs: the cube costs and weighs extra, and the published body is an inch too tall and wide for the common 22 × 14 × 9-inch U.S. limit. A large cube also consumes much of the space that makes the pack attractive for travel. Pack Hacker rated the harness highly but found the 45L's fit and organization more travel-oriented than a simple trail pack. Choose it when modularity is worth the bulk, not merely because “45L” sounds versatile.
5. Lowepro PhotoSport BP 15L AW III — best camera bag for a minimalist setup
The Lowepro PhotoSport BP 15L AW III reverses the usual camera-bag priorities: most of the 15L is for hiking essentials, while a removable 2L GearUp insert protects one small mirrorless body with a compact lens and one additional small lens. The cube's interior is 7.09 × 5.51 × 3.15 inches (18 × 14 × 8cm), so this is for APS-C, Micro Four Thirds and genuinely small full-frame combinations—not a gripped body or large telephoto.
If you are pairing this bag with a first body, our guide to the best cameras for beginners lists several compact APS-C choices. Compare the loaded body-and-lens dimensions with the GearUp insert before buying.
At 2.43 pounds (1.1kg) and 17.32 × 9.06 × 7.09 inches (44 × 23 × 18cm), it stays compact and carry-on friendly. The ActivZone harness combines contoured shoulder straps with a wide padded waist belt, and a dedicated sleeve accepts a 2L hydration reservoir. Lowepro lists a 100 × 300D nylon/polyester exterior, 75% recycled fabric panels and an included All Weather cover for rain, snow and dust.
Strengths: hiking-first layout; removable camera insert; proper hydration pocket; comfortable belt for its size; room for a layer above the camera compartment.
Tradeoffs: the tiny camera insert rules out many full-frame setups, and tripod carry is compromised. In a long-form independent PhotoSport review, the reviewer liked its versatility but found the tripod attachment inadequate and the 15L insert too small for larger cameras. It is the right answer when the hike is the main event and photography requires one compact body, not when the camera list grows “just in case.”
6. f-stop Tilopa 50L DuraDiamond — best camera backpack for winter and wet weather
The f-stop Tilopa 50L DuraDiamond is the large expedition option. Its 50L shell uses an aluminum internal frame, padded waist belt, load lifters and rear-panel camera access. f-stop publishes a 20,000mm waterproof rating for the DuraDiamond exterior fabric, plus welded weather-resistant zippers and a Hypalon base. Those component claims are stronger than the vague “weather resistant” language common in this category, but the complete stitched pack is still not a dry bag.
The shell weighs 4.2 pounds (1.9kg) before an ICU and is about 24.5 × 13.7 × 11.1 inches (62.3 × 34.8 × 28.2cm using the safer published depth). The Pro Large ICU adds 1.71 pounds (0.76kg), bringing that practical configuration to about 5.9 pounds before gear. A 3L hydration compartment and many external attachment points suit winter layers, poles and other bulky equipment.
Strengths: high-capacity hiking harness; strong published fabric rating; interchangeable ICUs; back-panel opening; frame and belt for substantial loads.
Tradeoffs: it is oversized for ordinary day hikes and exceeds standard U.S. carry-on dimensions. It also lacks a conventional stretch water-bottle pocket, a limitation highlighted in TechRadar's long-term Tilopa review. It makes sense for snow gear, multi-day supplies or a large wildlife kit; otherwise the extra volume invites extra weight.
7. PGYTECH OneMo Lite 22L — best-value camera bag with a modular camera compartment
At a current manufacturer price of $159.95, the PGYTECH OneMo Lite 22L provides configurable internal organization, side quick access, a laptop sleeve, tripod pocket and multiple exterior attachment points for substantially less than the premium modular packs. The rigid hook-and-loop partitions can be removed or rearranged, although they do not form a separate zippered cube.
The 22L pack weighs 3.53 pounds (1.6kg) with partitions and measures 18.11 × 12.99 × 9.25 inches (46 × 33 × 23.5cm). PGYTECH lists a polyester-and-PU shell as splash-proof and explicitly says it should not remain in heavy rain; this Lite version does not include a rain cover. Its 9.25-inch depth is also a quarter-inch beyond the American/Delta template on paper.
Strengths: low price for a structured 22L camera bag; highly configurable dividers; side access; laptop and tripod storage; current U.S. availability.
Tradeoffs: it lacks a load-transferring hiking waist belt, and full-compartment access requires putting the bag down. There is no removable cube or included rain cover. A long-term independent owner report found the bag durable and roomy after more than a year, but that experience does not turn its urban-style harness into a trekking suspension. Use it on maintained hiking trails with moderate loads, not as a substitute for a fitted backcountry pack.
Camera accessories: camera cubes, inserts, and rain protection
A camera cube lets the pack serve more than one purpose, but its outside dimensions matter more than its liter label. Three useful reference sizes are:
- Shimoda Medium Mirrorless Core Unit V2: 11.4 × 11.4 × 5.1 inches (29 × 29 × 13cm), 1.1 pounds (0.5kg). It mates with the Action X30's side opening.
- Peak Design Camera Cube V2 Smedium: 12.2 × 8.9 × 5.9 inches (31 × 22.5 × 15cm), 10L and 17.6 ounces (500g) with dividers. The published dimensions make it a sensible one-body choice inside the Outdoor 45L.
- f-stop Pro Large ICU: 15 × 11.5 × 7 inches (38.1 × 29.2 × 17.8cm), 1.71 pounds (0.76kg). Its 330D nylon shell has a 1,500mm polyurethane coating, and it leaves more non-camera space in the Tilopa than the taller Pro XL.
Rain covers reduce direct exposure, but water can still enter between the pack and your back. If a bag does not include one, Sea to Summit markets the medium Ultra-Sil Pack Cover for 50–70L packs; it measures 25.6 × 13.8 × 11 inches (65 × 35 × 28cm) and weighs 4 ounces (113g). The maker does not publish a hydrostatic-head number for that cover and cautions that wind-driven rain can enter around the harness.
For prolonged rain, place electronics and spare clothing inside roll-top dry bags as a second barrier. Sea to Summit's Ultra-Sil Dry Bag publishes a 2,000mm hydrostatic-head rating; it is intended for organization inside a pack, not immersion. Keep a lens cloth and small towel accessible, and let a wet pack dry fully before storing it.
Hip-belt pockets are more useful than they appear. They keep batteries warm in winter, hold a lens cap during a shot and prevent snacks from sharing space with glass. If a pack lacks them, use a maker-approved belt pouch rather than hanging a heavy lens from an improvised loop that could alter the pack's balance.
How to choose the right camera pack for hiking
Evaluate comfort, protection, access, and trail-use tradeoffs
The right pack should carry like hiking equipment first and organize like camera equipment second. Evaluate the harness with real weight, then decide how much protection and quick access the camera compartment needs. Every extra divider, zipper, and layer of padding adds security and weight; every larger camera cube takes space away from water, clothing, and emergency gear.
Plan the whole load. Adventure photographers and traveling photographers should ask how much camera gear the assignment requires, then add water, food, clothing, camping gear, and safety items. A hiking backpack outfitted with a camera insert can be a versatile option for overnight trips and long hikes because most hiking backpacks manage mixed loads better than a camera-first travel backpack. For hiking elopements, travel photography, or other outdoor shoots, test weight distribution with all photography gear, long lenses, extra batteries, SD cards, and the tripod attached. A fully loaded bag that feels fine on day trips can become uncomfortable over long distances.
Start with fit, not camera capacity. Measure your torso and compare it with the maker's fit range. Load the candidate bag with the weight you expect to carry, tighten the waist belt over the top of the hip bones, then adjust shoulder straps, load lifters and sternum strap. If the belt slides, the back panel length feels wrong, or the shoulder straps leave gaps, more padding will not solve the geometry.
Choose camera space last. Lay out the body, attached lens, one realistic spare lens, batteries and filters. Add only the equipment tied to a planned photograph. A half-size cube usually leaves a healthier balance between photo gear, water, insulation and first-aid supplies than a full-height ICU.
Match access to the trail. Side access works for frequent stops and can keep a camera off dusty ground. Rear access is secure in transit and creates a broad work surface, but often requires taking the pack off. A top-loading cube is simple and light, yet slow when buried beneath a jacket. There is no universally best camera compartment—only the one that matches how often you change lenses.
Treat ventilation and padding as a tradeoff. Thick closed-cell foam protects equipment and insulates your back; suspended mesh moves more air but shifts the load farther from your center of gravity. For a heavy lens kit, keeping mass close to the spine generally improves weight distribution more than maximizing airflow.
Plan for water twice. Use the shell and rain cover as the first line, then a dry bag or waterproof wrap around sensitive items. Never put a hydration bladder in the same unprotected cavity as a camera if a leak would drain directly into the insert.
Check the loaded flight dimensions. Compression straps, an unfilled roll top and removable hip belts can help, but a manufacturer carry-on claim does not override an airline sizer. The Shimoda, Think Tank and PhotoSport fit the 22 × 14 × 9-inch comparison on published dimensions; the other four require closer scrutiny or checked-baggage planning.
Common camera bag questions
What should I look for in a camera backpack for hiking?
Prioritize five things: a torso length that fits, a hip belt that supports weight distribution, a padded camera compartment with adjustable dividers, fast access that suits how you shoot, and separate space for water and trail essentials. A rain cover or water-resistant shell helps, but electronics still need an internal dry barrier in sustained rain. For DSLRs or mirrorless cameras with large lenses, also look for an internal frame and a low center of gravity that keeps heavy gear close to your back.
Can I use a regular hiking backpack with a camera cube?
Yes. A well-fitting hiking backpack plus a padded camera cube can protect camera gear while preserving trail comfort, ventilation, and overnight capacity. Measure the cube's outside dimensions, place it close to your back, and stop it from shifting. Most hiking backpacks lack side or rear camera access, so you may need to remove food or clothing before reaching the camera. Add an internal dry bag because a camera insert alone is not waterproof.
How should I carry a camera while hiking?
Keep the camera inside its padded compartment while scrambling, crossing water, or moving through rain. On easier ground, a secure camera clip, cross-body strap, or dual camera harness can provide quick access, but use a safety tether and prevent the camera from hitting rock or vegetation. Keep spare batteries, memory cards, and a lens cloth in a zippered belt pocket; carry a tripod in compression straps or a dedicated tripod holder, not loose under a single strap.
Is a camera sling bag good for hiking?
A camera sling bag can work for a short walk with one small body and lens, but it places most of the load on one shoulder and usually has little room for water, insulation, or first-aid supplies. For a sustained hike, a two-strap camera backpack with a fitted hip belt distributes weight more evenly. A sling is best treated as a light-access option, not a replacement for a trail pack under a dense load.
Is any waterproof camera backpack truly waterproof?
Most products described as a waterproof camera backpack are more accurately water resistant. Coated fabric, sealed zippers, and a rain cover reduce exposure, but stitched harness openings remain vulnerable and very few makers rate the complete pack for immersion. Use an internal dry bag or waterproof wrap as a second barrier, and never assume a rain cover makes camera gear safe in a river crossing.
What size camera backpack for hiking should I buy?
About 15L can suit one compact camera and a day-hike load; 25–35L is more flexible for a moderate mirrorless kit, water, food, and a layer; 45–50L is justified by winter equipment, long lenses, or overnight supplies. Choose the smallest camera backpack for hiking that fits the planned shot and mandatory trail gear without overpacking the camera compartment.
Which camera backpack is best for you?
- Long-distance day hikes with a moderate mirrorless kit: Shimoda Action X30 V2, provided its loaded fit works for your torso.
- Short day hikes with camera gear taking priority: Think Tank BackLight Sprint.
- One compact camera plus normal hiking supplies: Lowepro PhotoSport BP 15L AW III.
- Travel clothing and a changeable photo kit in one system: Peak Design Outdoor Backpack 45L with a Smedium or Medium Camera Cube.
- Large bodies, long lenses and a short approach: Lowepro Pro Trekker BP 450 AW II.
- Winter, multi-day or gear-heavy backcountry work: f-stop Tilopa 50L with the smallest ICU that fits the assignment.
- Occasional maintained trails on a tighter budget: PGYTECH OneMo Lite 22L, with a separate rain cover and a restrained load.
Final thoughts and practical tips
The Shimoda Action X30 V2 is our best camera backpack recommendation for the widest range of hikers because it combines genuine fit adjustment, modular protection and useful trail storage. The smaller Lowepro PhotoSport is the more disciplined choice for one-camera hiking, while the Tilopa earns its size only when conditions or equipment truly demand it.
Published specifications are a starting point. Camera gear load, torso shape and airline rules vary, so try the pack under weight when possible, confirm cube dimensions against your actual photography gear, and recheck the current manufacturer and airline measurements before buying or flying.